وب سایت تخصصی شرکت فرین
دسته بندی دوره ها

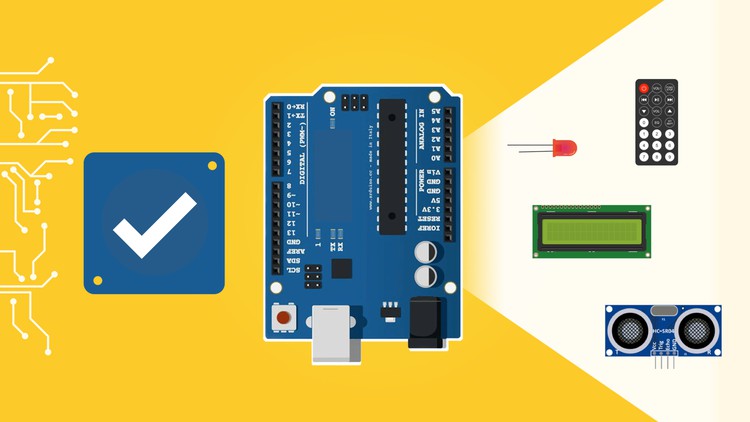
Arduino For Beginners – 2023 Complete Course

سرفصل های دوره

Arduino Step by Step | Robotics | Hands-on | Arduino Projects | Home Automation | Arduino Programming


01 - Introduction
  • 001 Welcome!
  • 002 What is Arduino
  • 003 List of Materials for this Course + Recommendations
  • 003 List-of-Materials-Arduino-For-Beginners.pdf
  • 004 Online Simulation - Quick Overview
  • 005 How to get the most out of this course

  • 02 - Install and Setup Arduino IDE + Tinkercad Simulation
  • 001 Intro
  • 002 Install the Arduino IDE on your Computer
  • 003 Customize your Arduino IDE for Better Readability
  • 004 Connect your Arduino board and Find it on the Arduino IDE
  • 005 Simulation - Create a Tinkercad account + How to Get Started

  • 03 - Your First Arduino Project
  • 001 Intro
  • 002 Arduino Setup and Loop Functions
  • 003 Your First Arduino Project Make an LED Blink
  • 004 Debug Your Projects with the Serial Monitor
  • 005 How to Restart your Arduino Program (Different ways)
  • 006 Simulation - Your First Program + Debug + Restart
  • 007 Activity 01- Change the LED Blink Rate, and Print a Message when it Turns onoff
  • 008 Activity 01 - Solution
  • 008 activity1.zip

  • 04 - Create an Arduino circuit
  • 001 Intro
  • 002 Understand How a Breadboard Works
  • 003 Decrypt the Color Code From Resistors
  • 004 Quick Recommendations on Hardware Manipulation - PLEASE WATCH
  • 005 Create a Circuit with 1 LED and 1 Resistor
  • 005 arduino-circuit-1-led.zip
  • 006 Make your new LED Blink

  • 05 - Programming Basics for Arduino
  • 001 Intro
  • 002 Variables
  • 003 Data Types
  • 004 Functions
  • 005 Scope
  • 006 Conditions
  • 007 Loops
  • 008 Arrays
  • 009 Arduino-Programming-Basics-Recap.pdf
  • 009 Recap

  • 06 - LEDs - Digital Pins as Output Pins
  • 001 Intro
  • 002 How Digital Pins Work as Output Pins
  • 003 Set a Digital Value - Power on an LED
  • 004 How Digital Pins Work with Analog Values (PWM)
  • 005 Set an Analog Value - Change the Brightness of an LED
  • 006 Activity 02- Make an LED Fade inout
  • 007 Activity 02 - Solution
  • 007 activity2.zip

  • 07 - Push Button - Digital Pins as Input Pins
  • 001 Intro
  • 002 Add a Push Button to Your Circuit
  • 002 arduino-circuit-push-button.zip
  • 003 How Digital Pins Work as Input Pins
  • 004 Read a Digital Value - Detect When the Button is Pressed
  • 005 Activity 03 - Power on an LED Only if the Button is Pressed
  • 006 Activity 03 - Solution
  • 006 activity3.zip
  • 007 A Nice Additional Tool to Visualize Data on the Arduino IDE - Serial Plotter

  • 08 - Potentiometer - Analog Pins
  • 001 Intro
  • 002 Add a Potentiometer to Your Circuit
  • 002 arduino-circuit-potentiometer.zip
  • 003 How Analog Pins Work
  • 004 Read an Analog Value From the Potentiometer
  • 005 Activity 04 - Set the LED Brightness with the Potentiometer
  • 006 Activity 04 - Solution
  • 006 activity4.zip
  • 007 Extra Use an Analog Pin as a Digital Pin

  • 09 - Practice More with Arduino Pins
  • 001 Arduino-For-Beginners-Pins-Recap.pdf
  • 001 Intro - Arduino Pins Recap
  • 002 Add 2 More LEDs to Your Circuit
  • 002 arduino-circuit-3-leds.zip
  • 003 Activity 05 - Create a Small Traffic Light System
  • 004 Activity 05 - Solution
  • 004 activity5.zip
  • 005 Activity 06 - Blink 3 LEDs When the Button is not Pressed
  • 006 Activity 06 - Solution
  • 006 activity6.zip
  • 007 Activity 07 - Improve The Previous Project with Functions and Arrays
  • 008 Activity 07 - Solution
  • 008 activity7.zip

  • 10 - Serial Communication - Send and Receive Data
  • 001 Intro
  • 002 Send Data with Serial
  • 003 Receive Data with Serial
  • 004 Change Serial Baud Rate for Faster Communication
  • 005 Activity 08 - Set an LED Blink Rate from the Serial Monitor
  • 006 Activity 08 - Solution
  • 006 activity8.zip

  • 11 - Time Functionalities - Improve Your Programs and Multitask
  • 001 Intro
  • 002 Pause the Execution with delay() and delayMicroseconds()
  • 003 The Problem with delay()
  • 004 Get the Time with millis() and micros()
  • 005 Compute the Duration of an Action
  • 006 The Solution to Avoid Using delay()
  • 007 Blink Multiple LEDs without delay()
  • 008 Activity 09 - Re-write the Previous Activity on Serial without delay()
  • 009 Activity 09 - Solution
  • 009 activity9.zip
  • 010 Activity 10 - Multitask Run 3 Actions Simultaneously
  • 011 Activity 10 - Solution
  • 011 activity10.zip

  • 12 - Debounce the Push Button
  • 001 Intro
  • 002 The Bounce Problem - Experiment
  • 003 The Bounce Problem - Explanation
  • 004 Debounce the Push Button
  • 005 Activity 11 - Toggle a Different LED when Pressing on the Button
  • 006 Activity 11 - Solution
  • 006 activity11.zip

  • 13 - Arduino Interrupts
  • 001 Intro
  • 002 What are Interrupts, When to Use Them
  • 003 Set up an Interrupt in Your Program
  • 004 Software Debounce Inside an Interrupt
  • 005 Warnings About Interrupts - When to usenot to use
  • 006 Activity 12 - Count How Many Times you Press on the Push Button with Interrupts
  • 007 Activity 12 - Solution
  • 007 activity12.zip

  • 14 - EEPROM - Save Values on the Arduino
  • 001 Intro
  • 002 What is EEPROM, When to Use it
  • 003 Save and Retrieve Values with EEPROM
  • 004 Activity 13 - Save an LED Max Brightness for the Next Program Run
  • 005 Activity 13 - Solution
  • 005 activity13.zip

  • 15 - Ultrasonic Sensor - Measure Distances
  • 001 Intro
  • 002 Add the Ultrasonic Sensor to Your Circuit
  • 002 arduino-circuit-ultrasonic-sensor.zip
  • 003 How the Ultrasonic Sensor Works + pulseIn() function
  • 004 Get the Distance From an Obstacle
  • 005 Activity 14 - Measure the Duration of the pulseIn() Function
  • 006 Activity 14 - Solution
  • 006 activity14.zip
  • 007 Use the Ultrasonic Sensor with Interrupts Instead of pulseIn()
  • 008 Activity 15 - Power on a Different LED Depending on the Distance From an Obstacl
  • 009 Activity 15 - Solution
  • 009 activity15.zip
  • 010 Extra - Improve the Stability of the Ultrasonic Sensor

  • 16 - LCD Screen - Display Text Directly on Your CircuitRobot
  • 001 Intro
  • 002 Add the LCD Screen to Your Circuit
  • 002 arduino-circuit-lcd-screen.zip
  • 003 Print Text on the LCD Screen + Tune it with the Potentiometer
  • 004 Play with the LCD Cursor
  • 005 Activity 16 - Print Serial Input on LCD Screen
  • 006 Activity 16 - Solution
  • 006 activity16.zip
  • 007 Activity 17 - Print Distance From Obstacle on LCD Screen
  • 008 Activity 17 - Solution
  • 008 activity17.zip

  • 17 - IR Remote Controller - Make Your Projects More Interactive
  • 001 Intro
  • 002 Add the IR Receiver to Your Circuit
  • 002 arduino-circuit-ir-remote.zip
  • 003 Install a new Arduino Library with the Arduino IDE
  • 004 Get Data From the IR Remote Controller (Library v2)
  • 005 Change Library Version (v3) and Get Data From the IR Remote Controller
  • 006 Map the Data You Read with the Controllers Buttons
  • 007 Use a Switch Structure to Handle IR Commands
  • 008 Activity 18 - Choose which LED to Power on with the Remote Controller
  • 009 Activity 18 - Solution (Part A)
  • 010 Activity 18 - Solution (Part B)
  • 010 activity18-v2.zip
  • 010 activity18-v3.zip

  • 18 - Photoresistor - Measure Luminosity
  • 001 Intro
  • 002 Add the Photoresistor to Your Circuit
  • 002 arduino-circuit-photoresistor.zip
  • 003 Read the Luminosity from the Photoresistor
  • 004 Activity 19 - Power on LEDs if its Getting too Dark
  • 005 Activity 19 - Solution
  • 005 activity19.zip
  • 006 Activity 20 - Compute the Average Luminosity Over a Period of Time
  • 007 Activity 20 - Solution
  • 007 activity20.zip

  • 19 - Final project - Interactive Obstacle Detection
  • 001 Arduino-For-Beginners-Final-Project.pdf
  • 001 Intro - Project Overview and Final Result
  • 001 arduino-circuit-final-project.zip
  • 002 Step 1 - Get Distance with Ultrasonic Sensor
  • 002 final-project-step1.zip
  • 003 Step 2 - Change LED Blink Rate Depending on the Distance
  • 003 final-project-step2.zip
  • 004 Step 3 - Lock the Application When an Obstacle is Detected
  • 004 final-project-step3.zip
  • 005 Step 4 - Unlock the App with the Debounced Push Button
  • 005 final-project-step4.zip
  • 006 Step 5 - LCD Setup and Welcome Message
  • 006 final-project-step5.zip
  • 007 Step 6 - Print Distance and Warning Message on LCD Screen
  • 007 final-project-step6.zip
  • 008 Step 7 - Setup IR Remote Controller and Map Buttons
  • 008 final-project-step7.zip
  • 009 Step 8 - Unlock the App when Pressing on the Play Button
  • 009 final-project-step8.zip
  • 010 Step 9 - Change and Save (EEPROM) the Distance Unit
  • 010 final-project-step9.zip
  • 011 Step 10 - Switch Between Different LCD Screens and Reset Settings
  • 011 final-project-step10.zip
  • 012 Step 11 - Print Luminosity and Adjust the Lighting from the Photoresistor
  • 012 final-project-step11.zip
  • 013 Simulation - Code with Version 2 of the IR remote Library
  • 013 final-project-step11-v2.zip
  • 014 Project Conclusion - Going Further
  • 015 Tips and Best Practices to Create Your Own Arduino Project

  • 20 - Conclusion
  • 001 What Youve Learned
  • 002 What to do next
  • 003 Bonus Lecture.html
  • 139,000 تومان
    بیش از یک محصول به صورت دانلودی میخواهید؟ محصول را به سبد خرید اضافه کنید.
    خرید دانلودی فوری

    در این روش نیاز به افزودن محصول به سبد خرید و تکمیل اطلاعات نیست و شما پس از وارد کردن ایمیل خود و طی کردن مراحل پرداخت لینک های دریافت محصولات را در ایمیل خود دریافت خواهید کرد.

    ایمیل شما:
    تولید کننده:
    مدرس:
    شناسه: 23816
    حجم: 3143 مگابایت
    مدت زمان: 899 دقیقه
    تاریخ انتشار: 12 آذر 1402
    طراحی سایت و خدمات سئو

    139,000 تومان
    افزودن به سبد خرید