وب سایت تخصصی شرکت فرین
دسته بندی دوره ها

Transform Your Art: Using Procreate Masks to Try-On Creative Backgrounds

سرفصل های دوره


Allow yourself to create bold original art with your unique style without the fear of bad ideas ruining your art. Using a combination of thumbnails, Procreate layer masks, and digital compositing, learn how to preview background options and trial all your ideas for your work in progress (WIP) before you jump in with the first mark. Boost your confidence in new ideas and creative growth by allowing them a safe space to play before committing them to something you’ve spent your precious energy on. Digital compositing allows for non destructive edits that let your creative juices soar with zero risk. Once you learn the process, you’ll quickly find out there’s SO many more uses for this digital tool in your analogue art practice!


Do you ever:

  • Reach that point in the art process where you just finished the subject of your piece and you’re left staring at a lot of white space around it wondering “Now what”? 
  • Search for the courage to try a new or bold background approach, but settle for leaving it white or a safe (but maybe boring) background because “what if my new idea doesn't look good”?
  • Take a chance and try a new exciting background idea only to find out it’s not the best match for that particular artwork once it’s in?

I’ve been there, wishing I had a crystal ball to see what my ideas would look like, or unsure of what to add, wondering what color, texture, style would complete my piece. I knew how to do masks in Photoshop, but it was once I learned how to create masks in Procreate, and speed up the turnaround of sketch to mockup, that I felt how easily I could test new ideas on the fly and get back to my art.

Taking it from the beginning, we’ll cover:

  • How thumbnails help you explore more options, try bigger ideas, and produce more satisfying and unique solutions.
  • Accurate art capturing and editing to get the most out of the mock up.
  • Basic Procreate tools like import, layers, layer masks, layer settings, and exporting.
  • How to look for great choices within your layered options and dial in on the perfect match.
  • How to fine tune your composited image to see what your next steps are.
  • Applying the idea of the thumbnail to the original artwork.
  • Evaluating and celebrating your creative and original artwork

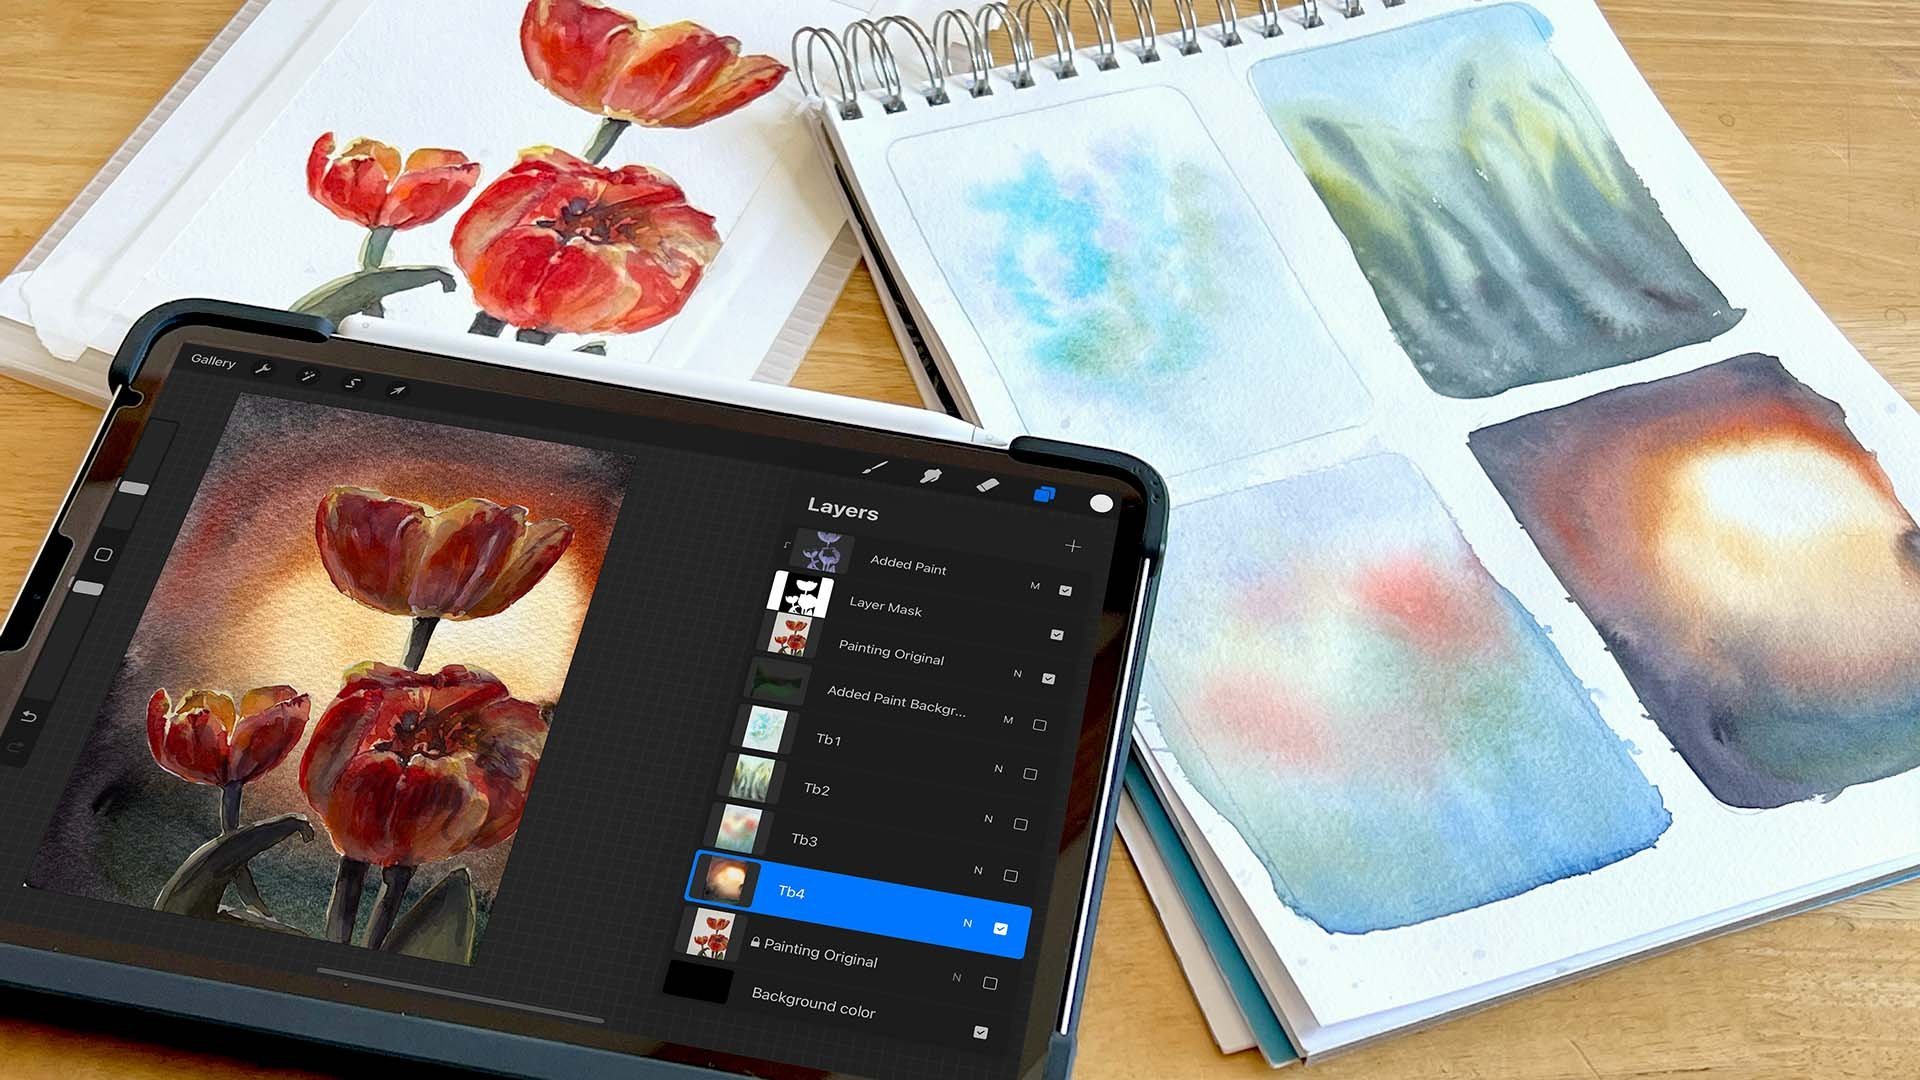
For the class project you can explore background options for your own in-progress artwork with thumbnails and use Procreate to craft your favorite combination to try out in real life! 

This class is a great process guide for anyone that creates 2D artwork and gets stumped on backgrounds. Whether you face indecision or fear of running a piece you’ve spent energy on, the core value of these steps is to give you room to explore your more creative or “crazy” ideas without that scary risk that comes with venturing into unknown ground. By working digitally, we’ll be able to mock up how that big next step would look with the wonderful option to “undo”.


The process is simple, but the uses are vast. 

  • My favorite is dropping in thumbnails of possible backgrounds. We’ll cover this in depth during the class!
  • Too much white space in the starting piece? Try out adding additional elements, moving them around to see how they may improve your composition.
  • Test out, or create new digital composites of your work for commissions, prints, patterns, or licensing opportunities.
  • Avoid overworking. Hone in on the right color to add late in the game, or see if extra layers are even necessary. No more, “I should have stopped 3 layers ago”...

Don’t have Procreate but want to add this to your process? You can do the class in Photoshop or any other program that has layering and masking. The exact steps and tools may be a little different, but the objective and flow are the same!

If you’re ready to take your backgrounds to the next level or simply want a little reassurance that the background you’re envisioning is the right choice, this class will help you “try on” those ideas for the best fit. Say goodbye to boring (or blank!) backgrounds, and hello to new art that truly expresses your unique style! 

I can’t wait to share how this process can start to transform your work with original and fearless backgrounds!

Need some extra help or want to dive deeper? Here's some additional resources!

Do more with masks in Procreate:

Do more with Thumbnails:

Music credit: “Watercolor” by Utah (via MusicBed)


  • Transform Your Art- Using Procreate Masks to Try-On Creative Backgrounds - Jill Gustavis
  • Transform Your Art- Using Procreate Masks to Try-On Creative Backgrounds - Jill Gustavis_2
  • Transform Your Art- Using Procreate Masks to Try-On Creative Backgrounds - Jill Gustavis_3
  • Transform Your Art- Using Procreate Masks to Try-On Creative Backgrounds - Jill Gustavis_4
  • Transform Your Art- Using Procreate Masks to Try-On Creative Backgrounds - Jill Gustavis_5
  • Transform Your Art- Using Procreate Masks to Try-On Creative Backgrounds - Jill Gustavis_6
  • Transform Your Art- Using Procreate Masks to Try-On Creative Backgrounds - Jill Gustavis_7
  • Transform Your Art- Using Procreate Masks to Try-On Creative Backgrounds - Jill Gustavis_8
  • Transform Your Art- Using Procreate Masks to Try-On Creative Backgrounds - Jill Gustavis_9
  • Transform Your Art- Using Procreate Masks to Try-On Creative Backgrounds - Jill Gustavis_10
  • Transform Your Art- Using Procreate Masks to Try-On Creative Backgrounds - Jill Gustavis_11
  • 45,900 تومان
    بیش از یک محصول به صورت دانلودی میخواهید؟ محصول را به سبد خرید اضافه کنید.
    خرید دانلودی فوری

    در این روش نیاز به افزودن محصول به سبد خرید و تکمیل اطلاعات نیست و شما پس از وارد کردن ایمیل خود و طی کردن مراحل پرداخت لینک های دریافت محصولات را در ایمیل خود دریافت خواهید کرد.

    ایمیل شما:
    تولید کننده:
    مدرس:
    شناسه: 3321
    حجم: 3559 مگابایت
    مدت زمان: 69 دقیقه
    تاریخ انتشار: 29 دی 1401
    طراحی سایت و خدمات سئو

    45,900 تومان
    افزودن به سبد خرید