وب سایت تخصصی شرکت فرین
دسته بندی دوره ها

Mastering Adobe Camera Raw

سرفصل های دوره

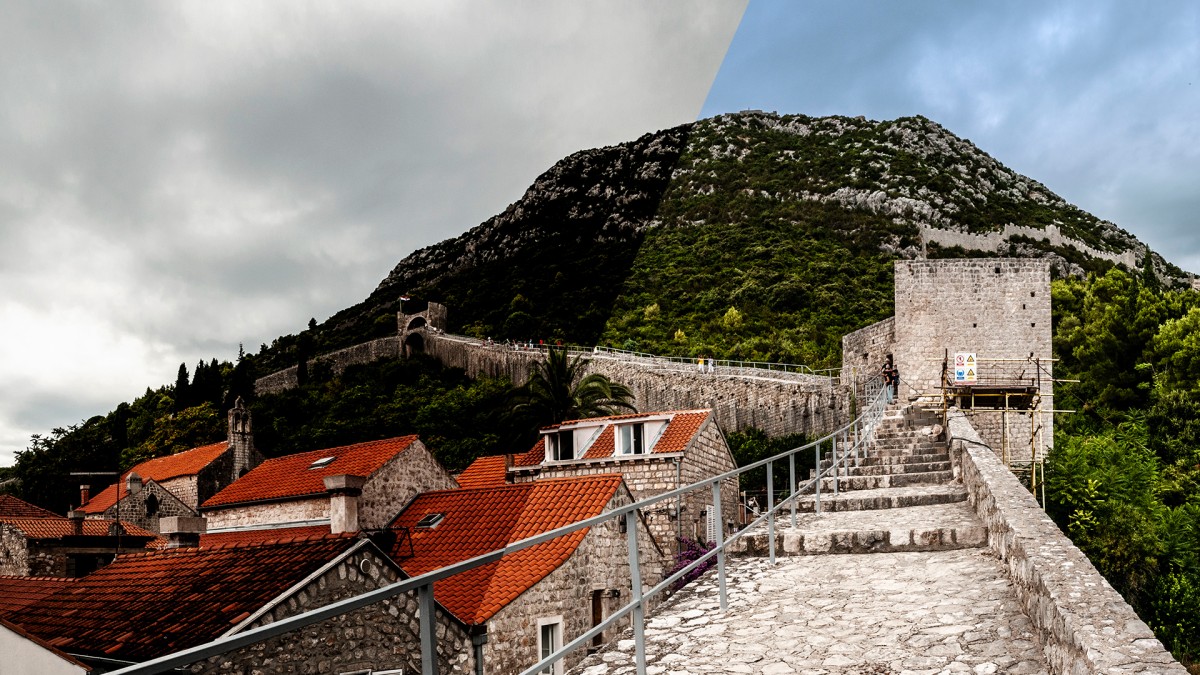
Discover new imaging superpowers by mastering the tools in Adobe Camera Raw, the engine at the heart of all Adobe photo editing software. Learn what RAW files and DNG files are, as well as how to convert RAW files to DNG files with super resolution. Find out how to access Camera Raw from Photoshop, Lightroom, Lightroom Mobile, and After Effects; open and edit a RAW image; and work with the toolbar, slider controls, views, and panels. Learn about tone curves, adding details, and working with HSL, grayscale controls, color grading, optics corrections, and effects. Dive into camera calibration and the presets and snapshots that can save you loads of time. Discover how to use essential tools and advanced controls. Instructor Rich Harrington closes the course with creative techniques for merging images and panoramas, plus tips for adjusting workflow options and converting raw files to other formats.

This course was created by RHED Pixel. We are pleased to offer this training in our library.


01 - Introduction
  • 01 - Want to master Adobe Camera Raw
  • 02 - What you should know before watching this course
  • 03 - Using the exercise files

  • 02 - 1. Understanding Raw Files
  • 01 - What is a raw file and why must they be processed
  • 02 - What are DNG files
  • 03 - Enhancing raw files by converting to DNG with Super Resolution

  • 03 - 2. An Introduction to Adobe Camera Raw
  • 01 - One technology, many ways to access
  • 02 - Using Adobe Camera Raw in Photoshop
  • 03 - Using Adobe Camera Raw in Adobe Bridge
  • 04 - Using Adobe Camera Raw in Lightroom Classic
  • 05 - Using Adobe Camera Raw in Lightroom
  • 06 - Using Adobe Camera Raw in Lightroom Mobile
  • 07 - Using Adobe Camera Raw in After Effects

  • 04 - 3. Working with Raw Files
  • 01 - Opening a raw file and how edits are stored
  • 02 - Working with the toolbar
  • 03 - Working with slider controls
  • 04 - Using the Before and After views
  • 05 - Customizing the Edit panels
  • 06 - Customizing the Filmstrip view
  • 07 - Adjusting essential Camera Raw preferences

  • 05 - 4. Basic Adjustments
  • 01 - Starting with a raw profile
  • 02 - Setting proper white balance
  • 03 - Adjusting tone
  • 04 - Adjusting depth and color
  • 05 - Using the histogram to adjust images

  • 06 - 5. Tone Curves
  • 01 - Using Parametric Curves and the Targeted Adjustment tool
  • 02 - Using point curves
  • 03 - Using color channels
  • 04 - Saving curves presets

  • 07 - 6. Adding Detail
  • 01 - Sharpening your photo
  • 02 - Cleaning up an image with noise reduction
  • 03 - Revisiting the Texture and Clarity controls

  • 08 - 7. Working with the Color Mixer Controls
  • 01 - Adjusting hue
  • 02 - Adjusting saturation
  • 03 - Adjusting luminance
  • 04 - Combining HSL adjustments with masks
  • 05 - Working with grayscale images

  • 09 - 8. Working with Color Grading
  • 01 - What is color grading
  • 02 - Creating an effective color grade

  • 10 - 9. Working with Optics Corrections
  • 01 - Using built-in lens profiles
  • 02 - Refining lens corrections
  • 03 - Removing chromatic aberrations

  • 11 - 10. Working with Effects
  • 01 - Adding grain
  • 02 - Adding vignettes
  • 03 - Creating custom vignettes

  • 12 - 11. Camera Calibration
  • 01 - The role of the Camera Calibration tab
  • 02 - Setting a custom calibration

  • 13 - 12. Working with Presets and Snapshots
  • 01 - Working with premium presets
  • 02 - Creating your own presets
  • 03 - Creating advanced Adobe profiles
  • 04 - Adding a LUT to Adobe profiles
  • 05 - Refining Adobe profiles
  • 06 - Adding snapshots to store different versions

  • 14 - 13. Essential Tools
  • 01 - Cropping and straightening
  • 02 - Using crop overlays for additional control
  • 03 - Fixing perspective issues
  • 04 - Geometric transformations
  • 05 - Removing spots
  • 06 - Check healing with the Overlay tool

  • 15 - 14. Advanced Controls
  • 01 - The Enhance Details command
  • 02 - Working with the Upright adjustment
  • 03 - Cloning an area
  • 04 - Making local adjustments
  • 05 - Working with object-based masks
  • 06 - Working with Sky-based masks
  • 07 - Adjusting the background with a mask
  • 08 - Making range-based masks
  • 09 - Working with brushes and gradients
  • 10 - Using depth mattes

  • 16 - 15. Merging Panoramic Images
  • 01 - Merging panoramic images
  • 02 - Correcting distortion in panoramic images
  • 03 - Developing panoramic images, part 1
  • 04 - Developing panoramic images, part 2

  • 17 - 16. Merging HDR Images
  • 01 - Merging HDR images
  • 02 - Correcting ghosting in HDR images
  • 03 - Developing HDR images

  • 18 - 17. Workflow Options
  • 01 - The workflow options connection to photos
  • 02 - Working with raw files as Photoshop smart objects
  • 03 - Converting to DNG files
  • 04 - Converting to other file formats
  • 05 - Batch exporting files
  • 06 - Storing or resetting settings

  • 19 - Conclusion
  • 01 - Next steps
  • 139,000 تومان
    بیش از یک محصول به صورت دانلودی میخواهید؟ محصول را به سبد خرید اضافه کنید.
    خرید دانلودی فوری

    در این روش نیاز به افزودن محصول به سبد خرید و تکمیل اطلاعات نیست و شما پس از وارد کردن ایمیل خود و طی کردن مراحل پرداخت لینک های دریافت محصولات را در ایمیل خود دریافت خواهید کرد.

    ایمیل شما:
    تولید کننده:
    شناسه: 15593
    حجم: 3944 مگابایت
    مدت زمان: 344 دقیقه
    تاریخ انتشار: 12 تیر 1402
    طراحی سایت و خدمات سئو

    139,000 تومان
    افزودن به سبد خرید