در حال حاضر محصولی در سبد خرید شما وجود ندارد.

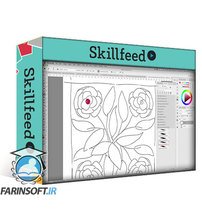
In this class, we will take a drawn design, scan it and clean it up in Photoshop, then trace it using the Image Trace feature in Adobe Illustrator.
With the Image Trace feature, you can take raster (bitmap) artwork and automatically trace to convert into vector artwork. This means that you can take scans of sketches, illustrations, and even photographs, and convert them into vector artwork that can be edited in Illustrator. Since you can see the results live, it helps to play with the settings a bit to get accustomed to what effect they have, and that’s what we will be doing! I will help ensure your success with this process. There is much to be taken into consideration, especially cleaning up the initial image.
Cleaning up an image is important for getting a good trace in Illustrator. There are a number of techniques that help get rid of unwanted imperfections, and we will cover many in this class. The Image Trace feature is not new — in previous versions it was known as Live Trace — but it has been greatly improved over the years, believe me! Additional options have been added, and you can easily access those options and “test” your trace using the Image Trace panel. I will explain how to do this in a step-by step way. But wait. There’s more…
Live Trace tends to produce an extraneous amount of anchor points in some places. To get rid of some of these we can use the Smooth Tool, which is utterly amazing! If some shapes did not trace properly, we will deal with that in several ways, and we will talk about ways they can be quickly be redrawn. We will correct every motif in the scan! At this point you can alter, delete or add to your vector design as you creatively see fit. I have experimented with patterns in this class, so the last three lessons will focus on this. You can skip the last three lessons if all you want to learn about is Image Trace! The main thing is that you now have your art in vector form and can easily alter it in many creative ways.
As far as prerequisite skills, I would recommend some knowledge of Illustrator with the goal of wanting to learn additional techniques. In class, we’ll talk about both design and technical aspects of creating simple and quick patterns. I will demonstrate them at a reasonable pace so that it will be easy to follow along. This course is for all levels; I recommend being acquainted with Illustrator to a certain degree. I suggest pausing and repeating sections and possibly even slowing the speed in your browser when trying to work through any difficult parts. Adobe Illustrator is recommended for this class, as that is what is being featured here, but any other draw (vector) software is suitable, as long as it has the same functionality.
The key concepts I will include are:
This course is packed with easily digested and bite-sized steps for you no matter at what stage you are in your design career. Take a chance and find out some fun little things you may never have seen or even thought of before! You can be applying this practical knowledge in your design practice tomorrow. Image tracing from a hand-drawn illustration and creating a pattern collection can be done relatively quickly with this small investment of your time. Hit your play button now!
Intro and Overview
This video is the introduction of the Illustrator Image Trace class by Delores Naskrent. In this class, we will prepare motifs for pattern design and more.
Lesson 1: Scanning and Clean Up of Image
In this lesson, I will explain the best practices for scanning and will explain the difference between jpegs and tiffs. We will take the scan into Photoshop and work on improving it for use with Image Trace in Illustrator. Many strategies will be used including the dust and scratches and noise filters in Photoshop as well as levels adjustments. We use the Magic Wand and the Expand Selection function to lighten some lines. I will even show you quick masking techniques and the use of the Pen Tool for smoothing.
Lesson 2: Image Trace Settings in Illustrator
In this lesson, we will review all the Image Trace Settings and will experiment as we view the artwork in the background. This gives us a Live Preview which is helpful in determining the best settings to use. I will explain the rationale behind each of the settings.
Lesson 3: Cleaning Up the Tracing
In this lesson, we will take an in-depth look at cleaning up the tracing. I show you many different techniques and tools like the blob brush, the eraser tool and more. I will show you how to remove anchor points efficiently and the magical Smooth Tool!
Lesson 4: Complex Corrections on Motifs
I will give you some ideas for using functions like rotation and offset path to alter motifs, as well as many Pathfinder functions.
Lesson 5: Leafy Branch Touchup Tricks
There are many methods to deal with cleanup of the image trace. This lesson shows you some additional suggestions and ideas for repairs. We will do more experimentation with paths, merging, and the blob brush.
Lesson 6: Playing with the Patterns Options
We will use the motifs we have created to build a pattern design, beginning in this lesson. I will show you how to produce some quick coordinates with single motifs in various arrangements. Then we will begin the main pattern and I will share lots of tips and tricks along the way. There are several time-lapses that reveal much of the experimental work I do when developing a pattern.
Lesson 7: Arranging Motifs and Pattern Play
We will do more work on the pattern and start the testing process in this lesson. This lesson features time-lapse as you watch me work through the many possibilities. I work through the process of arriving at a well-balanced and attractive finished pattern layout.
Lesson 8: Motif Color Play and Coordinates
The pattern design process always involves experimentation with color, so that’s what we will start in this lesson. I use the Live Paint tool to color the pattern (see resources attached). I will show you some quick tricks with the re-color tool as well. At the end of the lesson I make two quick coordinates with methods I explained earlier in the class.
Lesson 9: Mockups and Wrap-Up
I will summarize the class in this lesson and will show you quick mockups incorporating a number of patterns I produced.
Concepts covered:
Concepts covered include but are not limited to the definition of raster and vector, lossy compression, jpeg versus tiff, offset path, the dust and scratches and noise filters in Photoshop, the magic wand tool, the expand selection function, the rotate tool, import with place command, the smooth tool, the blob brush, the eraser tool, remove anchor point, lasso tool, the anchor point tool illustrator Pattern Options panel, creating quick co-ordinates, pattern repeats, easy geometric patterns, easy floral patterns, creating stripes in Illustrator and much more.
You will get the bonus of…
در این روش نیاز به افزودن محصول به سبد خرید و تکمیل اطلاعات نیست و شما پس از وارد کردن ایمیل خود و طی کردن مراحل پرداخت لینک های دریافت محصولات را در ایمیل خود دریافت خواهید کرد.


طراحی گل های زیبا و ساده بوسیله Affinity Designer

آموزش ساخت یک محیط و منظره طبیعی در Procreate

طراحی کاغذ دیواری برای فروش بوسیله تبلت

Enhanced Stylized Line Art for Pattern Design in Adobe Illustrator Using the Offset Filter

آموزش طراحی روسری در نرم افزار Adobe Photoshop

Vector Brush Gorgeous Line Art Floral Repeat Pattern

Blending Traditional and Digital Approaches to Create Elegant Pattern Repeats

Seamless Half Drop Repeat and Exploring Colorway Options Using Pattern Preview in Photoshop 2021

Simple Fast Folk Art Inspired Half Drop Toss Pattern Using Filters, Transformations, & Pattern Maker

تصویرگری و نقاشی دیجیتال الگوهای موزاییکی در نرم افزار Procreate
✨ تا ۷۰% تخفیف با شارژ کیف پول 🎁
مشاهده پلن ها