وب سایت تخصصی شرکت فرین
دسته بندی دوره ها

Python Django: Build an E-commerce Store – 2023

سرفصل های دوره

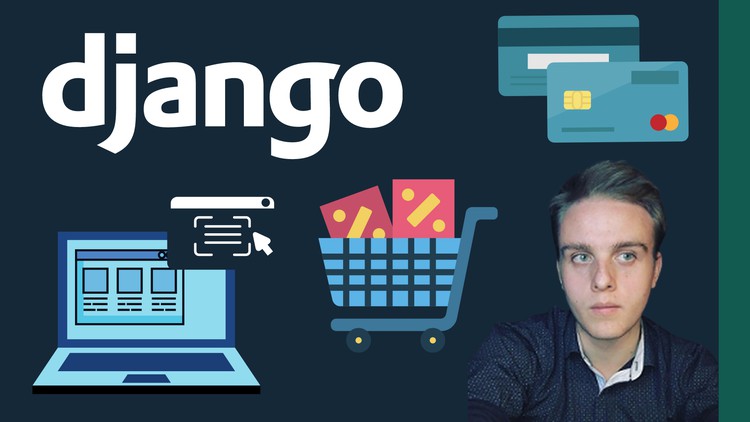
Build an E-commerce Store with Django | Hands-on demonstrations | Deploy a Django Web Application


1. Course Introduction
  • 1. Course overview
  • 2. Thought process
  • 3. QA forums

  • 2. Resources
  • 1.1 dev.zip
  • 1. Code and slides - download

  • 3. Baseline Introduction and setup
  • 1. Python installation and setup
  • 2. Visual Studio Code installation and setup
  • 3. VS Code extensions

  • 4. Django Installation and setup
  • 1. Django project setup
  • 2. Configure the Python interpreter
  • 3. CMD VS code terminal for commands

  • 5. Building our models
  • 1. Create a Django app - (store)
  • 2. Building our models
  • 3. Adding an image field
  • 4. Configuring Django for static files
  • 5. Configuring Django for image uploads
  • 6. Basic - Django admin configuration
  • 7. Advanced - Django admin configuration

  • 6. Basic templates, URL's and views
  • 1. Important links for this section - [NOTE].html
  • 2. Configure template rendering
  • 3. Configure our URL files and store view
  • 4.1 base.html
  • 4. Creating a base page
  • 5.1 store.html
  • 5. Creating the initial store page
  • 6. Populating our database
  • 7. Building the category view
  • 8.1 main-product-section.html
  • 8. Styling the main product data grid - Pt. 1
  • 9. Build the main product data grid - Pt. 2
  • 10. Creating the singular product page
  • 11.1 product-info.html
  • 11. Creating the singular product page - Continued
  • 12. Creating dynamic links
  • 13. Building the list category view
  • 14.1 list-category.html
  • 14. Building the product category data grid

  • 7. Cart functionality - Initial build-up
  • 1. Create a Django app - (cart)
  • 2. Configure basic urls and views for our cart
  • 3.1 cart-summary.html
  • 3. Build the cart summary template

  • 8. Cart functionality - Sessions
  • 1. Create a session
  • 2. Testing our session

  • 9. Cart functionality - Add
  • 1. AJAX integration - Add
  • 2. Add functionality - Pt. 1
  • 3. Cart functionality analysis
  • 4. Add functionality - Pt. 2
  • 5. Update the cart summary template
  • 6. Total price functionality
  • 7. Match price with quantity

  • 10. Cart functionality - Delete and Update
  • 1. AJAX integration - Delete
  • 2. Delete functionality
  • 3. AJAX integration - Update
  • 4. Update functionality

  • 11. Cart functionality - Testing
  • 1. Cart functionality testing

  • 12. User management
  • 1. Create a Django app - (account)
  • 2. Configure our URL files
  • 3. User registration - Pt. 1
  • 4. User registration - Pt. 2
  • 5. User registration - Pt. 3
  • 6. Email verification - templates
  • 7. Email verification - basic urls and views
  • 8.1 token.zip
  • 8. Email verification - tokens
  • 9. Email verification - view functionality - Pt. 1
  • 10. Email verification - view functionality - Pt. 2
  • 11.1 Setting up 2FA and creating an app password.pdf
  • 11. Setup the email backend
  • 12.1 Setting up 2FA and creating an app password.pdf
  • 12. Styling the email verification templates
  • 13. VS code - change the text appearance - [OPTIONAL]
  • 14. Email verification - final demonstration
  • 15. User authentication - Login
  • 16. User authentication - Logout
  • 17. Styling the dashboard template
  • 18. Integrate the profile management templates
  • 19. Profile management Updating our username and email
  • 20. Profile management Deleting an account

  • 13. App UI, styling and validation - Pt. 1
  • 1. Improving the UI and styling - (account)
  • 2. User validation - (account)
  • 3. Detailed app UI and styling

  • 14. Password management
  • 1. Creating our password reset views
  • 2. Integrating the password reset templates
  • 3. Password reset - initial test
  • 4. Styling the password reset templates
  • 5. Password reset - final demonstration

  • 15. App UI, styling and validation - Pt. 2
  • 1. User logout session adjustment - [IMPORTANT]
  • 2. Login validation
  • 3. Advanced user notifications
  • 4. Adding a timer to user notifications
  • 5. Additional app UI and styling - [OPTIONAL]
  • 6. Suggestion!.html

  • 16. Shipping and order functionality
  • 1. Create a Django app - (payment)
  • 2. Configure our basic URL files
  • 3. Build the shipping address model
  • 4. Implement the shipping form
  • 5. Construct the shipping view and url - (account)
  • 6. Organize the shipping template - (account)
  • 7. Build the checkout template
  • 8. Checkout functionality
  • 9. Build the order and order item model
  • 10. AJAX - complete checkout
  • 11. Process order functionality - Pt. 1
  • 12. Process order functionality - Pt. 2
  • 13. AJAX redirection + Clear the shopping cart
  • 14. Process an order - Final demonstration

  • 17. Payment integration
  • 1. Important links for this section - [NOTE].html
  • 2. Create a PayPal account
  • 3. Creating our Sandbox accounts
  • 4. Logging into our Sandbox accounts
  • 5. PayPal - integration analysis
  • 6. PayPal - API integration
  • 7. Customize the PayPal buttons
  • 8. The essentials of validation
  • 9. Validating user input - Pt. 1
  • 10. Inserting the shopping cart price
  • 11. Validating user input - Pt. 2
  • 12. PayPal + Ajax integration
  • 13. Test a payment - PayPal
  • 14. Test a payment - Debit or Credit card
  • 15. Styling our payment templates
  • 16. Create a live account - IMPORTANT
  • 17. Order management

  • 18. Deployment - Phase l
  • 1.1 Create an AWS account.pdf
  • 1. Create an AWS account.html
  • 2. Create a budget in AWS
  • 3.1 AWS IAM- Creating a user.pdf
  • 3. AWS IAM - Theory review - [OPTIONAL]
  • 4. Create an AWS IAM user and a group
  • 5. Deploy our static files to Amazon S3
  • 6. Utilize an Amazon RDS database

  • 19. Domain name and SSL certificate
  • 1. AWS Route 53 - Theory review
  • 2. COST REMINDER!.html
  • 3. Register a domain name with Route 53
  • 4. Amazon Certificate Manager - Theory review
  • 5. Provision and assign an SSL certificate

  • 20. Deployment - Phase ll
  • 1. Installing important packages
  • 2. Preparing for deployment - Pt. 1
  • 3. Preparing for deployment - Pt. 2
  • 4. Security tips
  • 5. AWS Elastic Beanstalk - What is it
  • 6.1 Cost+guidance.pdf
  • 6. COST REMINDER!.html
  • 7. AWS CLI setup
  • 8. AWS EB CLI setup
  • 9. AWS credentials setup
  • 10. Generate a requirements.txt file
  • 11. IMPORTANT NOTE!.html
  • 12.1 django.zip
  • 12. Deploy our app to AWS Elastic Beanstalk - Pt. 1
  • 13. Deploy our app to AWS Elastic Beanstalk - Pt. 2
  • 14. How to re-deploy our web application
  • 15. How to enable sticky sessions

  • 21. Final demonstration
  • 1. Final demonstration - Build an E-commerce Store
  • 2. Resource cleanup

  • 22. Thank you!
  • 1. THANK YOU! - A final message
  • 2. Bonus lecture.html
  • 53,700 تومان
    بیش از یک محصول به صورت دانلودی میخواهید؟ محصول را به سبد خرید اضافه کنید.
    خرید دانلودی فوری

    در این روش نیاز به افزودن محصول به سبد خرید و تکمیل اطلاعات نیست و شما پس از وارد کردن ایمیل خود و طی کردن مراحل پرداخت لینک های دریافت محصولات را در ایمیل خود دریافت خواهید کرد.

    ایمیل شما:
    تولید کننده:
    مدرس:
    شناسه: 3182
    حجم: 6543 مگابایت
    مدت زمان: 1000 دقیقه
    تاریخ انتشار: 29 دی 1401
    طراحی سایت و خدمات سئو

    53,700 تومان
    افزودن به سبد خرید